Discover — How To?
Connect to X-Plane
To connect X-Plane to SPAD.neXt, some housekeeping has to be done first.
Start SPAD.neXt and head to Settings → Application → Simulations.
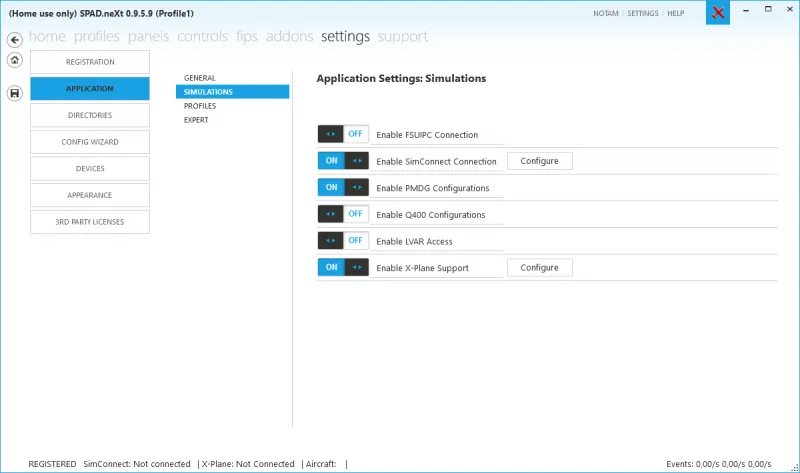
Enable X-Plane support, then click the "Configure" button next to it.
A dialog will open and tell you if the X-Plane plugin for SPAD.neXt has already been detected, and whether it's the correct version.
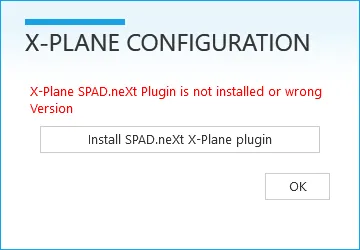
If it's not detected, click "Install SPAD.neXt X-Plane plugin" and the plugin installer will launch.
If SPAD.neXt and X-Plane are running on the same computer, you're done — launch X-Plane and have fun!
Remote Connection
If SPAD.neXt and X-Plane are running on different computers, you'll need to tell the plugin where SPAD.neXt is running.
First start X-Plane once, then exit it again.
Now head to your X-Plane installation folder and navigate to Output\Preferences.
Here you'll find a file called SPADneXtConnector.sdm.
Open it in your favorite text editor (e.g. Notepad). The file will look like this:
{
  "LocalConnection": true,
  "ServerHost": "127.0.0.1",
  "ServerPort": 8181
}
Change true to
false, and replace
127.0.0.1
with the IP (IPv4 or IPv6) of your SPAD.neXt PC.
The port should be fine as-is; however, if port 8181 on your SPAD.neXt PC is not available, SPAD.neXt will select another one. To find out which, head to Settings → Application → Expert in SPAD.neXt — you'll find an option "Remote Services" there with the port in use.
Save the file, and make sure the firewall on the SPAD.neXt PC has that port open.